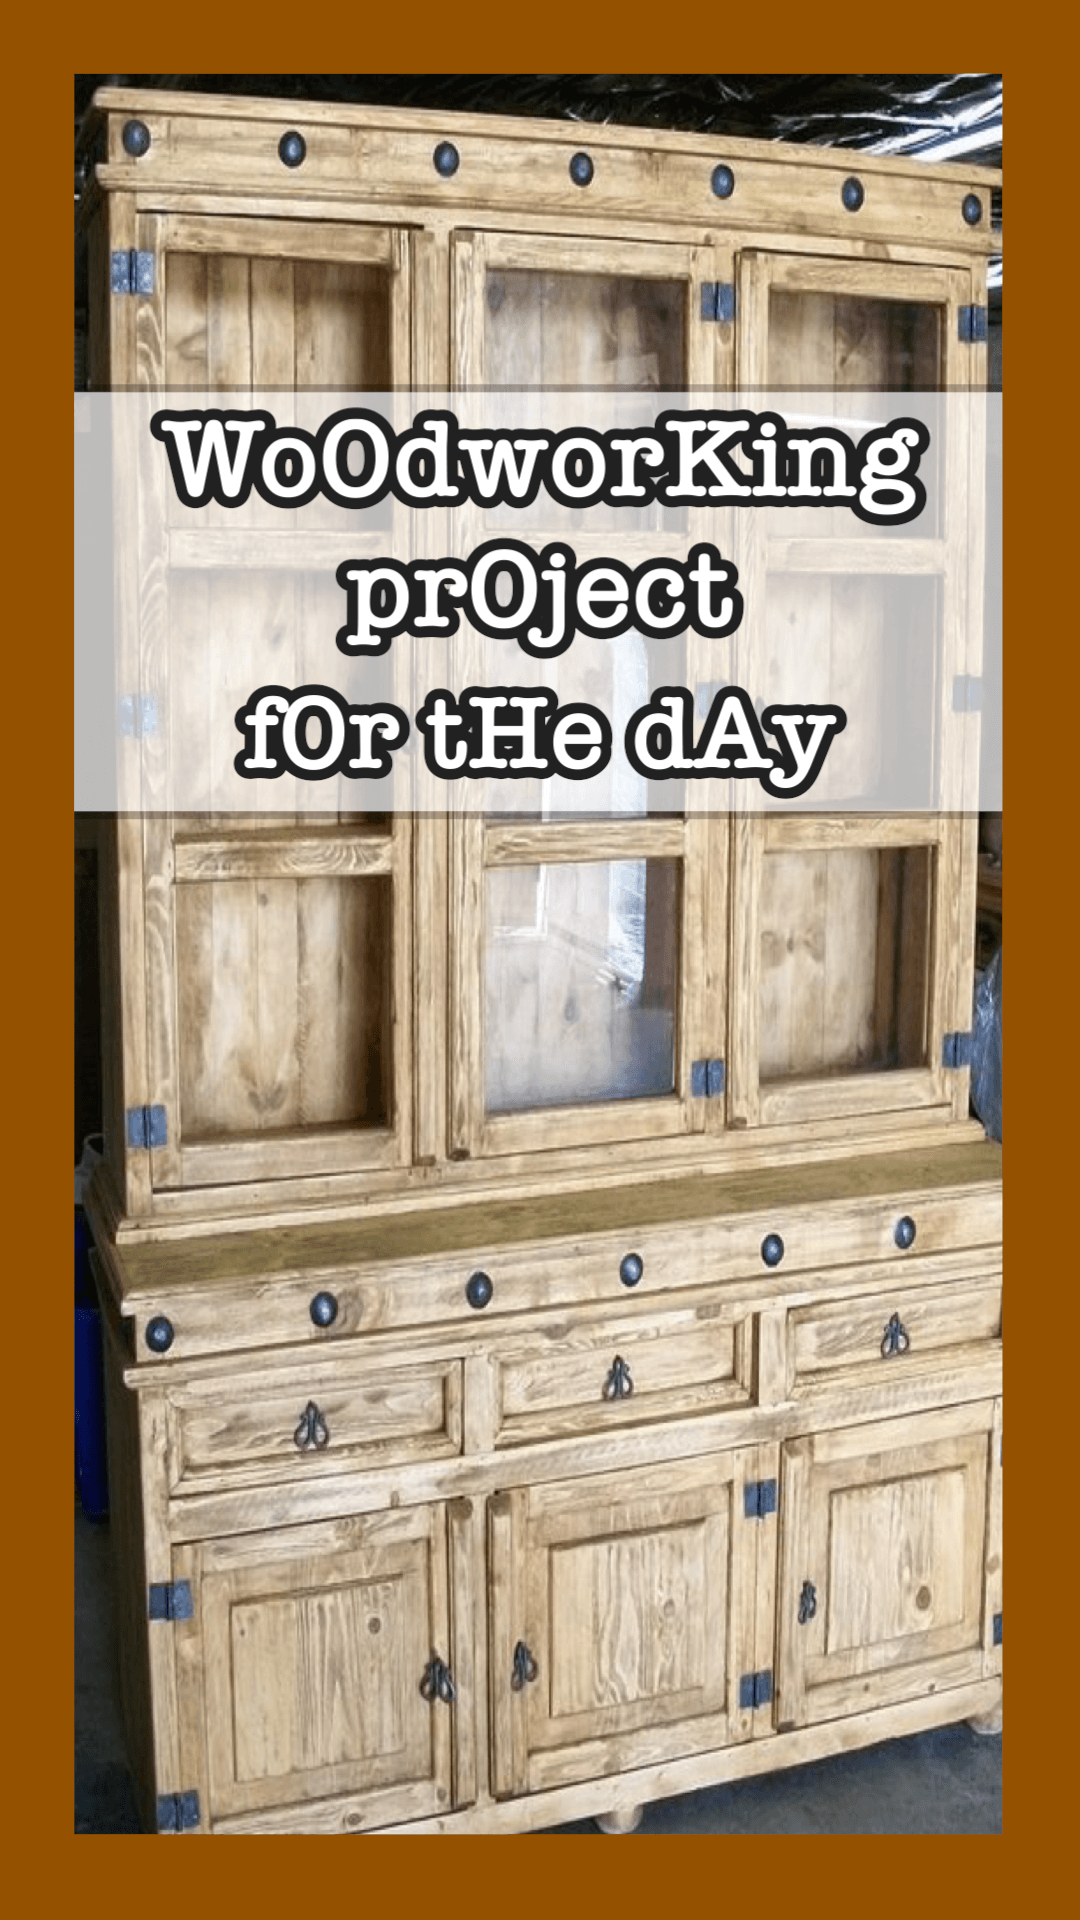
DIY Woodworking Hutch: A Step-by-Step Guide to Building Your Own
If you’re looking to add extra storage and style to your home, a DIY woodworking hutch is the perfect solution. Not only does a hutch provide ample space to store dishes, decor, or books, but it also adds a touch of rustic charm to any room. By building your own woodworking hutch, you can tailor it to match your specific style and dimensions. In this guide, we’ll walk you through how to create a custom DIY hutch from scratch, from choosing the right materials to finishing the piece. Let’s get started!

Why Build Your Own DIY Hutch?
While there are plenty of pre-made hutches available for purchase, building your own offers several advantages:
- Customization: You can create a hutch that fits perfectly in your space, with the exact dimensions, shelves, and design features you need.
- Cost Savings: Buying a high-quality hutch can be expensive, but when you build it yourself, you save money on labor costs.
- Quality Materials: When you construct a hutch yourself, you can ensure it’s made from solid, high-quality wood, ensuring it will last for years.
- Personal Satisfaction: There’s nothing quite like the feeling of accomplishment that comes from completing a DIY woodworking project and having a beautiful piece to show for it.
Choosing the Right Wood for Your Hutch
The type of wood you choose will have a big impact on the appearance, durability, and overall quality of your hutch. Here are a few recommended types of wood for building a DIY hutch:
- Oak: A classic choice for furniture-making due to its strength and durability. Oak offers a beautiful grain and is highly resistant to wear.
- Maple: Another durable hardwood that’s slightly lighter in color than oak, giving a cleaner, more modern appearance.
- Pine: If you’re on a budget, pine is a great option. It’s a softer wood, making it easier to work with, but it may dent more easily than hardwoods.
- Birch: A fine-grained wood that’s strong and resists warping. It’s a good option if you want a smooth finish.
- Plywood: For parts of the hutch that won’t be seen (like backing or interior shelves), plywood can be a cost-effective solution. Just make sure to choose a high-quality plywood with a smooth finish.
Tools You’ll Need to Build a DIY Hutch
A well-equipped toolkit is essential for any woodworking project. Here’s a list of tools you’ll need for building your DIY hutch:
- Circular Saw or Table Saw: For cutting large pieces of wood to size.
- Power Drill: For drilling holes and securing pieces together with screws.
- Clamps: To hold pieces in place while you work.
- Measuring Tape: To ensure all cuts are accurate.
- Square: For checking right angles and ensuring everything is aligned properly.
- Sander or Sandpaper: To smooth out any rough edges and surfaces.
- Wood Glue: For securing joints in addition to screws.
- Screws and Nails: Essential for attaching pieces together.
- Safety Gear: Always use protective goggles, gloves, and a dust mask while working.

Step-by-Step Guide to Building a DIY Woodworking Hutch
1. Determine the Size and Design of Your Hutch
Before you start cutting wood, decide on the size of your hutch. Consider how much storage you need and the height of the shelves. Sketch out a design plan, including the dimensions of the top and bottom cabinets, shelves, and any decorative features like molding or glass panels.
2. Cut the Wood for the Frame
Start by cutting the wood for the main frame of the hutch, including the side panels, top, and bottom. Use hardwood for the frame to ensure stability and durability. You’ll need to cut both the base and the upper cabinet pieces separately.
3. Assemble the Base Cabinet
Once you’ve cut the wood for the base cabinet, assemble it by attaching the side panels to the bottom panel using wood glue and screws. Ensure the structure is square and secure.
4. Add the Shelves and Dividers
Decide where you want your shelves and cut pieces of wood accordingly. Attach the shelves inside the cabinet using screws and wood glue. For added strength, you can insert shelf supports or braces.
5. Build the Upper Hutch
The upper part of the hutch will typically feature open shelves or cabinet doors with glass panels. Cut and assemble the upper frame using the same method as the base. Ensure the upper unit is sturdy since it will hold dishes or decorative items.
6. Attach the Back Panel
Using plywood, cut a back panel for both the upper and lower cabinets. Attach the back panel to the frame with nails or screws. This will add extra stability to your hutch.
7. Add Cabinet Doors
For a classic look, cut wood panels for the cabinet doors and attach them with hinges to the base and upper cabinets. You can choose between solid doors or add glass panels for a more decorative appearance.
8. Install the Hardware
Add knobs, handles, or decorative hardware to the cabinet doors. Make sure to align everything evenly for a polished look.
9. Sand the Entire Hutch
Once the structure is complete, use a sander or sandpaper to smooth out the surfaces and edges. Pay extra attention to corners and joints to ensure a smooth finish.
10. Apply Finish
To protect your wood and give it a professional appearance, apply a finish such as varnish, stain, or paint. Allow the finish to dry completely before moving the hutch to its final location.

20 Steps to Build a DIY Woodworking Hutch
- Measure the space where the hutch will go.
- Choose the type of wood (e.g., oak, maple, pine).
- Sketch the hutch design and dimensions.
- Cut the side panels, top, and bottom for the base.
- Assemble the base cabinet using wood glue and screws.
- Install interior shelves in the base.
- Cut and assemble the upper hutch frame.
- Add shelves and dividers to the upper section.
- Cut and attach a plywood back panel to the hutch.
- Build and attach the cabinet doors with hinges.
- Optional: Insert glass panels into the upper cabinet doors.
- Install knobs or handles on the doors.
- Sand all surfaces for a smooth finish.
- Apply wood filler to any gaps or holes.
- Sand again after applying filler.
- Apply stain or paint to the entire hutch.
- Allow the stain/paint to dry completely.
- Seal with varnish or wood finish for durability.
- Attach the upper hutch to the base securely.
- Move the hutch into place and start organizing!
Conclusion
Building your own DIY woodworking hutch can be a rewarding project that adds both functionality and beauty to your home. By following the steps outlined above and selecting high-quality materials, you’ll end up with a custom-made piece of furniture that’s not only practical but also reflects your personal style. Whether you use it in the kitchen, dining room, or even the living room, your hutch will be a proud display of your woodworking skills.