How to Create a Dream Woodshop: Layout and Organization
Project Blueprint Details
Stop guessing measurements. Get the exact cut lists and 3D diagrams to finish this project without mistakes.
ACCESS COMPLETE PROJECT VAULT >>Creating an organized and efficient woodshop is crucial for any DIY enthusiast or professional woodworker. A well-thought-out workshop layout not only improves productivity but also enhances safety, saves time, and ensures that your projects run smoothly. Whether you’re setting up a small garage workshop or a larger dedicated space, optimizing your woodshop organization is the key to success. In this article, we’ll guide you through essential tips for designing an efficient workshop layout, selecting the right types of wood, and picking the best DIY tools.
Workshop Layout Design: Key Considerations
Designing a functional woodshop layout starts with assessing your available space and how you plan to use it. Consider the following factors before setting up your workspace:
- Workflow: Map out how you move through the different phases of a project, from measuring and cutting to sanding and assembling. Your layout should support a logical flow from one station to another.
- Tool Placement: Group your tools based on their function and frequency of use. Keep frequently used tools, such as saws, drills, and clamps, within easy reach.
- Dust Collection System: Effective dust management is critical for health and safety. Plan for a dust collection system that can handle the type of tools you’ll be using.
- Lighting and Ventilation: Good lighting is essential for precision work, while proper ventilation keeps fumes and dust under control. Maximize natural light, and install adequate task lighting over workbenches and tool stations.
- Storage Solutions: Use cabinets, pegboards, and shelving to store tools and materials in an organized manner. Custom-built storage units can help you make the most of small spaces.
- Safety First: Ensure you have clear, unobstructed pathways and space around machines for safe operation. Additionally, keep fire extinguishers and first-aid kits easily accessible.
Types of Wood for Building Your Workshop Furniture
When constructing your woodshop organization system, including workbenches, shelves, and cabinets, the type of wood you use is important. Here are some recommendations:
- Plywood: Plywood is versatile, affordable, and strong, making it an excellent choice for workbenches, storage cabinets, and tool racks. Opt for a higher-grade plywood (like Baltic birch) for greater durability.
- Maple: This hardwood is a great choice for building work surfaces. Maple is durable, resistant to dings, and smooth, making it ideal for tabletops or tool mounts.
- Pine: Pine is a softwood that’s easy to work with and relatively inexpensive. It’s suitable for making shelving units and light-duty storage systems.
- MDF (Medium-Density Fiberboard): MDF is a cost-effective option for shelves, cabinets, or surfaces that don’t need to bear heavy loads. It’s smooth and easy to finish, but not as strong as plywood or solid wood.
- Oak: Oak is a premium hardwood often used for more permanent, sturdy builds. Consider oak for long-lasting, high-quality workbenches or cabinets.

How to Build an Efficient Woodshop Layout
- Measure Your Space: Begin by measuring the available square footage of your workshop. Create a scaled floor plan to ensure all tools and workstations fit comfortably.
- Designate Work Zones: Divide your workshop into zones for different tasks, such as cutting, sanding, and assembly. Keep related tools and materials in their respective zones for a logical workflow.
- Plan for Expansion: Ensure that your layout allows for the addition of future tools or workstations. Leaving some space between your current stations can provide flexibility as your woodshop grows.
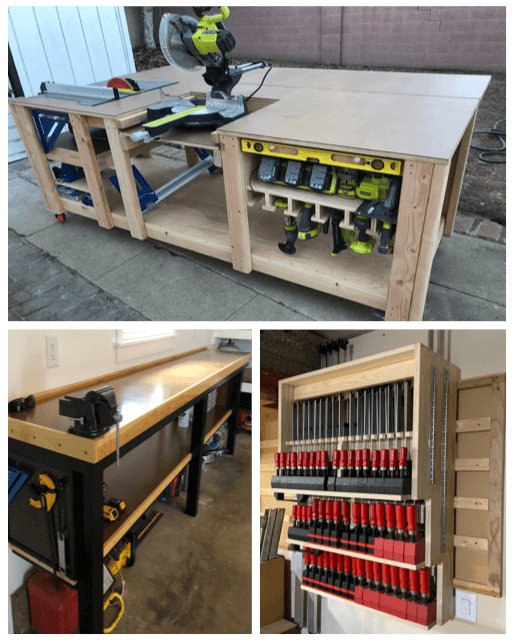
- Install Workbenches: Choose or build sturdy workbenches using maple or plywood. Ensure the height is comfortable for working while standing or sitting.
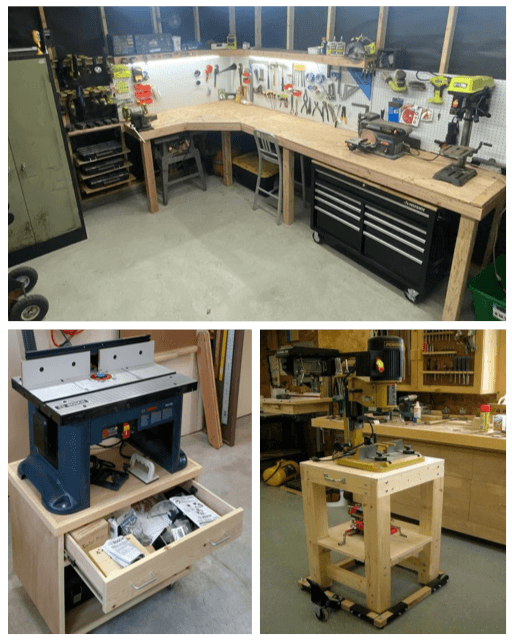
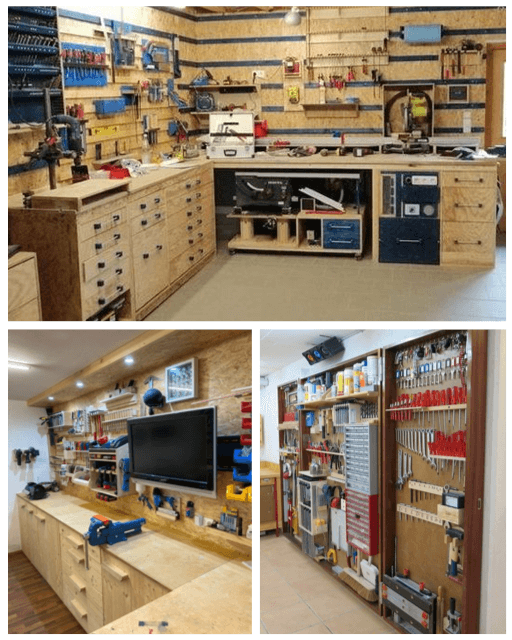
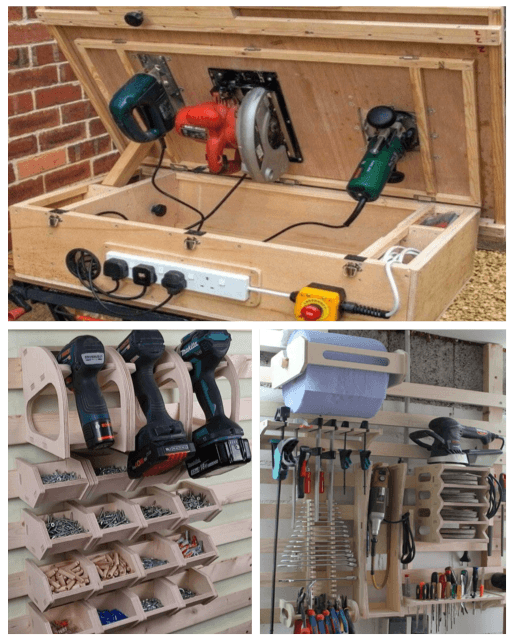
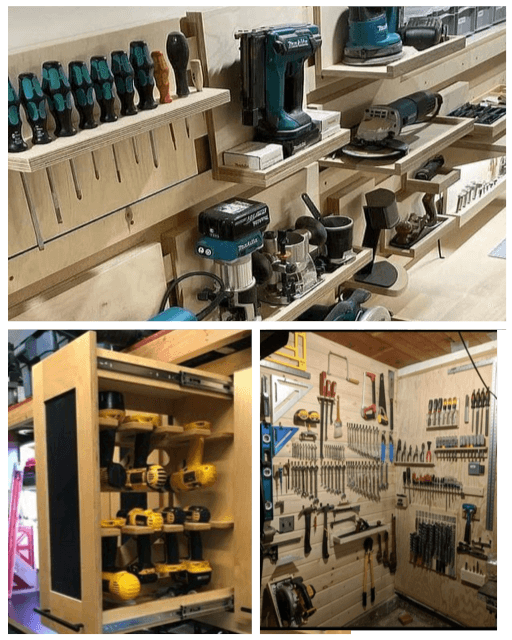
- Optimize Storage: Build custom cabinets and shelving using plywood or MDF. Pegboards on the walls are perfect for organizing hand tools like hammers, wrenches, and screwdrivers.
- Choose Mobile Tools: If you have a small space, consider putting some of your tools on wheels. Mobile bases make it easy to move heavy tools like table saws or drill presses when you need more room.
- Install Tool Racks: Build wall-mounted tool racks using durable wood like oak or pine. This will help you organize your most-used tools while keeping the work surfaces clear.
- Create an Outfeed Table: Build an outfeed table behind your table saw using plywood or MDF. This provides additional support when cutting large sheets of wood.
- Incorporate Dust Collection: Make sure your workshop layout has space for dust collection hoses to reach all the power tools. Install PVC piping for efficient dust management.
- Lighting Solutions: Add overhead lights and task lighting at key workstations. LED lights provide bright, energy-efficient illumination for detailed tasks.

20 Bullet Points: How to Build the Ultimate Workshop Layout and Woodshop Organization
- Measure the entire workshop area and sketch a floor plan.
- Designate work zones: cutting, assembly, finishing, and storage.
- Build a sturdy workbench with hardwood like maple or high-grade plywood.
- Install wall-mounted pegboards for organizing small hand tools.
- Build a mobile tool cart with pine or MDF for easy tool access.
- Use plywood for constructing strong, multi-tiered shelving units.
- Design cabinets with adjustable shelves to store various power tools.
- Install a dust collection system with PVC pipes for every workstation.
- Build a custom tool rack for saw blades and drill bits using oak or maple.
- Use MDF for lightweight shelves to store sandpaper, fasteners, and small items.
- Add a clamp storage rack to keep all sizes of clamps organized and within reach.
- Build a wood storage rack using 2×4 lumber to store sheet goods vertically.
- Design a sanding station with built-in dust collection for cleaner operation.
- Install overhead storage for large tools, wood, and infrequently used items.
- Attach wheels to the bottom of large tools like a table saw for mobility.
- Create a sharpening station for chisels and plane blades using durable wood.
- Ensure ample space around tools for safe operation, especially saws and lathes.
- Use dowels and plywood to build custom organizers for screws and nails.
- Build an outfeed table with plywood to extend your work surface for larger cuts.
- Install strong task lighting directly over the main workbench and tool stations.
By following these guidelines, you can create a woodshop that maximizes efficiency, keeps your tools and materials organized, and provides a safe environment for your woodworking projects. Whether you’re a beginner or a seasoned pro, these tips will help you build the ultimate workshop setup!
Project Blueprint Details
Stop guessing measurements. Get the exact cut lists and 3D diagrams to finish this project without mistakes.
ACCESS COMPLETE PROJECT VAULT >>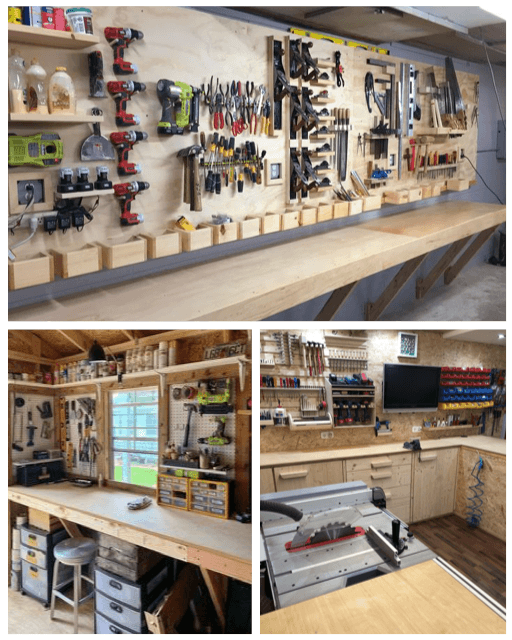


No Comments
Be the first to start a conversation