Every second you spend hunting for a charged battery is a second stolen from your craft.
It is time to stop the chaos and build the professional hub your tools deserve.
Project Blueprint Details
Stop guessing measurements. Get the exact cut lists and 3D diagrams to finish this project without mistakes.
ACCESS COMPLETE PROJECT VAULT >>The End of Workshop Frustration
Attention: Stop letting tangled cords and missing drills dictate the pace of your woodworking projects.
A cluttered workbench isn’t just an eyesore; it is a productivity killer that drains your creative energy every single day.
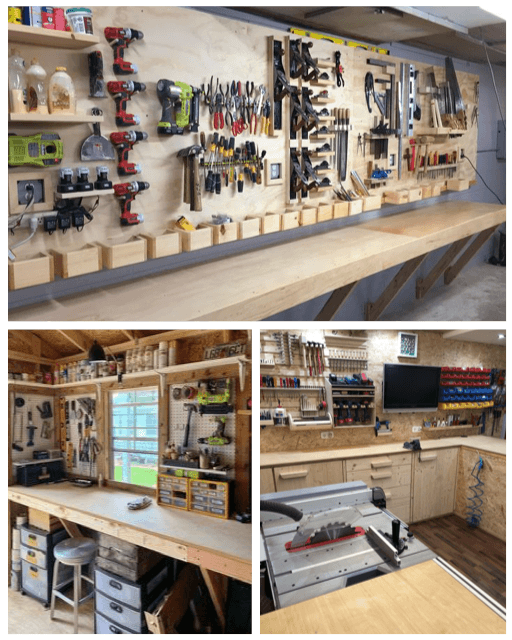
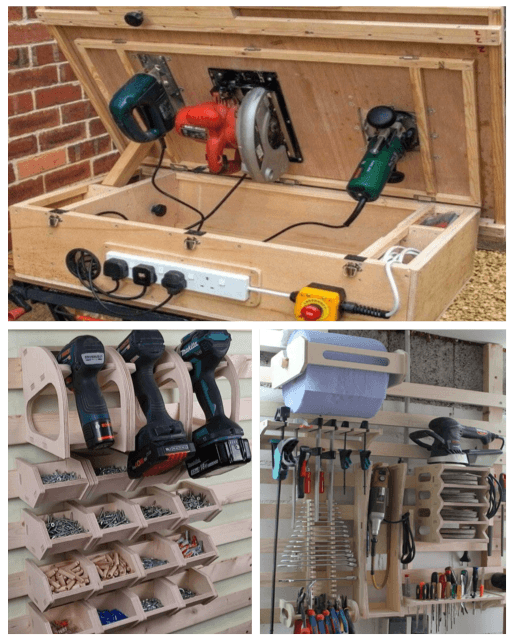
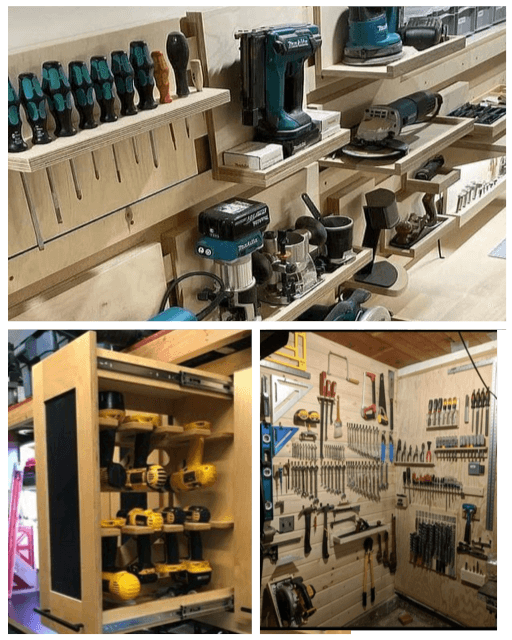
Interest: Imagine walking into your shop and seeing every Milwaukee, DeWalt, or Festool drill perfectly aligned in its own custom dock.
Imagine a dedicated power deck where chargers are neatly organized, wires are completely hidden, and batteries are always at 100% capacity.
This isn’t just a storage shelf; it is a precision-engineered Cordless Tool Charging Station designed to streamline your entire workflow.
Desire: Our team developed this blueprint to give you the same professional setup found in high-end cabinet shops.
With an integrated accessory drawer and a heavy-duty plywood frame, this station brings elite-level organization to any garage or woodshop.
You deserve a workspace that reflects the quality of the work you produce—clean, efficient, and ready for action at a moment’s notice.
Action: Don’t spend another day tripping over power strips or searching for that one missing impact driver.
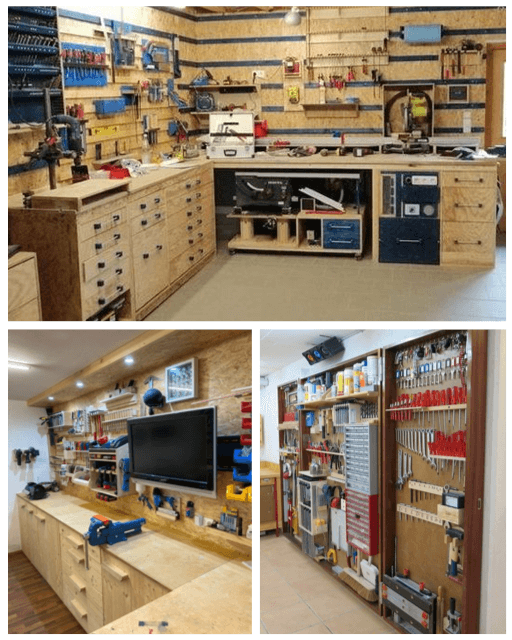
Why This Custom Charging Hub Outperforms Every Other Option
When you analyze a high-performance workshop layout, you realize that organization is built on three pillars: accessibility, power distribution, and shop footprint.
Generic plastic wall mounts often fail under the weight of heavy-duty batteries and vibrate loose during daily use.
A custom-built plywood charging station provides the superior vibration dampening required for high-end electronic chargers.
By utilizing vertical wall space and implementing hidden internal cable management, you effectively eliminate the “cord-octopus” that plagues most DIY shops.
Keeping your chargers mounted at eye level allows for instant visual status checks, ensuring you never grab a dead battery right before a critical task.
This specific design creates a centralized power hub that maximizes your square footage while keeping your most expensive tools safe and secure.
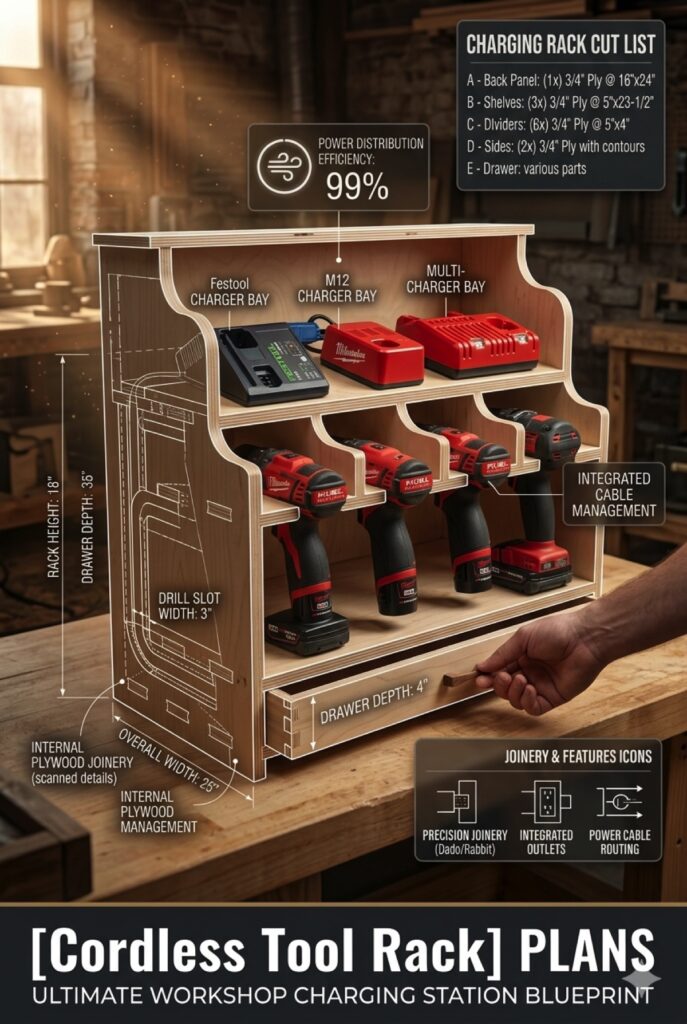
Quick Guide: Build Your Professional Tool Rack in 7 Steps
| Step | Action Item | Expert Pro-Tip |
|---|---|---|
| 1 | Material Selection | Use 3/4″ Birch Plywood for maximum structural integrity and a clean look. |
| 2 | Precision Cutting | Cut the main carcass pieces first to ensure a perfectly square frame. |
| 3 | The Drill Docks | Route 3-inch wide slots to accommodate various drill handle sizes and brands. |
| 4 | Power Integration | Drill 1-inch access holes behind the shelf to route all charging cables internally. |
| 5 | Carcass Assembly | Use Dado joints and high-quality wood glue for a joint that never sags. |
| 6 | The Accessory Drawer | Build a smooth-sliding drawer at the bottom for bits, hole saws, and spare parts. |
| 7 | Final Mounting | Use heavy-duty screws to secure the station directly into your wall studs. |
PRO-TIP: The Heat Management Rule
Rapid chargers generate significant heat during the peak charging cycle.
Always maintain at least 2 inches of clearance above each charging unit to allow for natural convection.
Proper ventilation prevents thermal throttling and extends the overall lifespan of your expensive battery cells.
Detailed Project Breakdown: Why You Need This Blueprint
Building this station is about more than just putting wood together; it is about reclaiming your workshop.
The building drawing package focuses on “The Elite 19” standards of workshop efficiency.
Every dimension in this plan has been tested to ensure that your tools fit snugly without being difficult to remove.
We have included a specific section for cable management because nothing looks worse than a beautiful wooden project covered in messy black wires.
The internal plywood management system ensures that every cord is routed to a single power strip hidden within the unit.
This means you only have one cord running to your wall outlet, keeping your shop safe and visually stunning.
The bottom drawer is deep enough to store those bulky battery cases or organized sets of drill bits that usually clutter your bench.
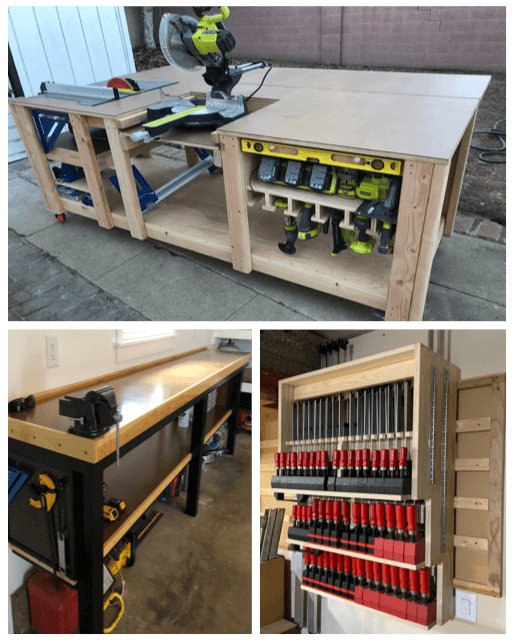
This design is modular, meaning you can build one for your main drills and another for your specialty impact tools or nailers.
The finish you choose is equally important, as shop dust can be abrasive to raw wood over time.
We recommend a hard-wearing oil or a simple polyurethane coating to make wiping off sawdust effortless.
By the time you finish this project, you will have a piece of workshop furniture that is as functional as it is beautiful.
Frequently Asked Questions
What is the best type of wood for this charging station?
We strongly recommend using 18mm or 3/4″ Birch Plywood for this specific project.
It provides the best resistance to warping and has enough density to hold heavy battery chargers without flexing.
How many tools can I fit in this design?
The standard blueprint is optimized for 5 cordless drills or impact drivers.
However, the modular nature of the building drawing package allows you to expand the width to fit 8 or 10 tools if needed.
Is it difficult to wire the internal power strip?
Not at all; the plans include a specific layout for cable routing.
You simply place a standard surge-protected power strip in the hidden compartment and plug your chargers into it.
Will my 18V or 20V chargers fit on the shelf?
Yes, the shelf depth is designed to accommodate all major professional brands including Milwaukee, DeWalt, and Makita.
Even the larger multi-battery rapid chargers fit comfortably with room for ventilation.
Does this require advanced woodworking skills?
This is a perfect project for intermediate woodworkers, but beginners can easily succeed with our step-by-step guide.
The use of standard plywood dimensions makes the cutting process very straightforward.
How do I mount it to the wall safely?
The back panel is designed to be screwed directly into at least two wall studs using 3-inch cabinet screws.
This ensures the station can hold the weight of all your tools and batteries without any risk of falling.
Take Command of Your Workshop Today
Stop letting a disorganized workspace hold back the quality of your builds.
Our team has spent hours perfecting this design so you don’t have to waste time figuring it out yourself.
Get the complete Cordless Tool Charging Station Blueprint Package and join the thousands of makers who have upgraded their shops.
This package includes the full Material-Matrix, the Cost-Calculator, and high-resolution assembly drawings.
Everything you need to succeed is included in this professional blueprint.
[DOWNLOAD THE FULL BLUEPRINT PACKAGE NOW]
.
Project Blueprint Details
Stop guessing measurements. Get the exact cut lists and 3D diagrams to finish this project without mistakes.
ACCESS COMPLETE PROJECT VAULT >>


No Comments
Be the first to start a conversation